Kids can utilize their creative ideas and convert them into a comic book. This hobby will improve the child’s thinking skills. It can be a time- consuming process but extremely rewarding and fulfilling.
So Kids, take out your pen and pencil and start drawing your imagination.
Sketch out your panels and add colour and texture over time. There are no hard-set rules, so have fun and create something true to you!
Step by Step Procedure to Create a Comic Book Art
1. Find inspiration for your comic
First, find something that you are passionate about. Choose a subject or character that excites you and create a comic about that.
2. Sketch the character
Now that you know what you want your comic to be about, it’s time to sketch what the characters will look like, in both words and drawings.
3. Write the story
Write the overall story you want to tell with your comic series.
4. Make the Borders
Now, create a border template so that all of your comics will be the same size and shape.
5. Do the lettering
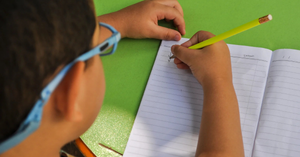
When you make a comic together, the lettering gives you the important handwriting practice you need, but it’s fun!
6. Pencilling
Now you need to draw the characters in pencil underneath the words you are saying.
These are just cartoons. They’re supposed to be silly!
7. Inking
Take the border template you made in the beginning and line it up over your pencilled border.
Carefully trace the pencilled border with a thin black Sharpie pen.
Next, you have to show your lettering skills once again when you carefully ink over the words you pencilled earlier.
8. Publish your Comic
You have just made art. You need to share this masterpiece with your friends!
Hope you all like it 🙂


Be the first one to comment on this story.