Hello kids! Daffodils are elegant and beautiful flowers. They stand out in a flower vase or even a beautiful wall hanging. A bouquet of daffodils also stands out in its own way. White and yellow daffodils make a beautiful garland too.
So today let’s make a beautiful paper cut daffodil and gift it as a beautiful handicraft to our loved ones.
Materials Required to Make DIY Paper Daffodil
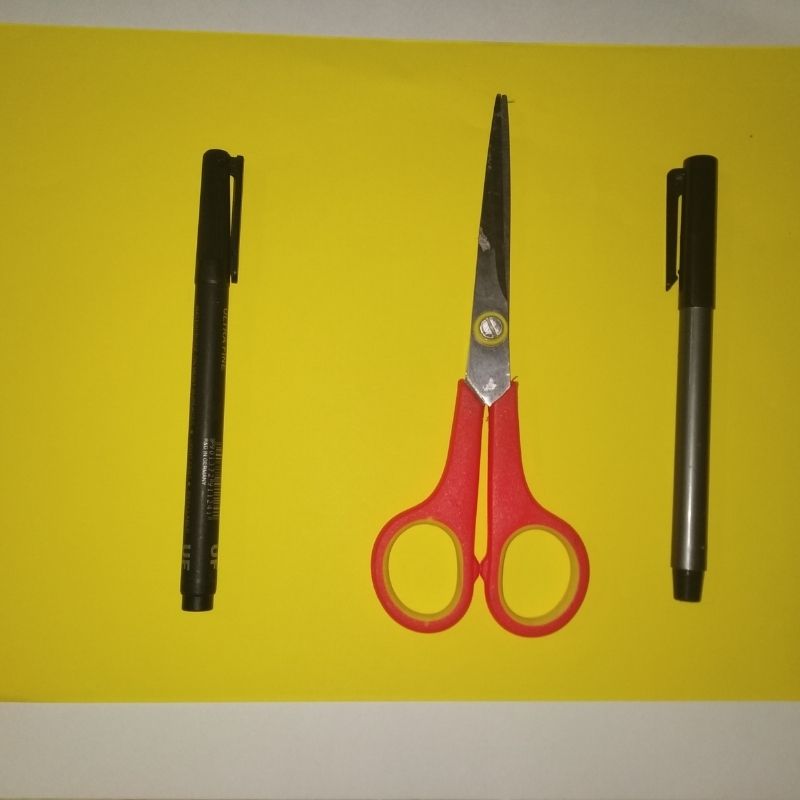
- Yellow paper
- Sketch pen
- Pencil
- Scissors
How to Make DIY Paper Daffodil Step by Step
- Take a yellow sheet of paper.
- The preferred size is A4
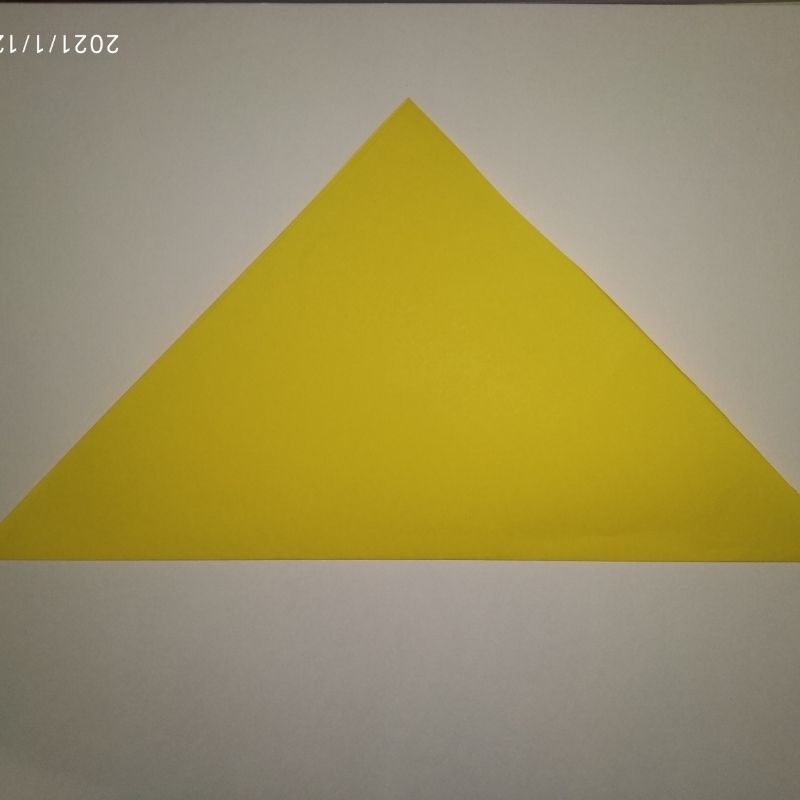
- Next, cut a square sized paper from this sheet. The size of the square should be around 20cms.

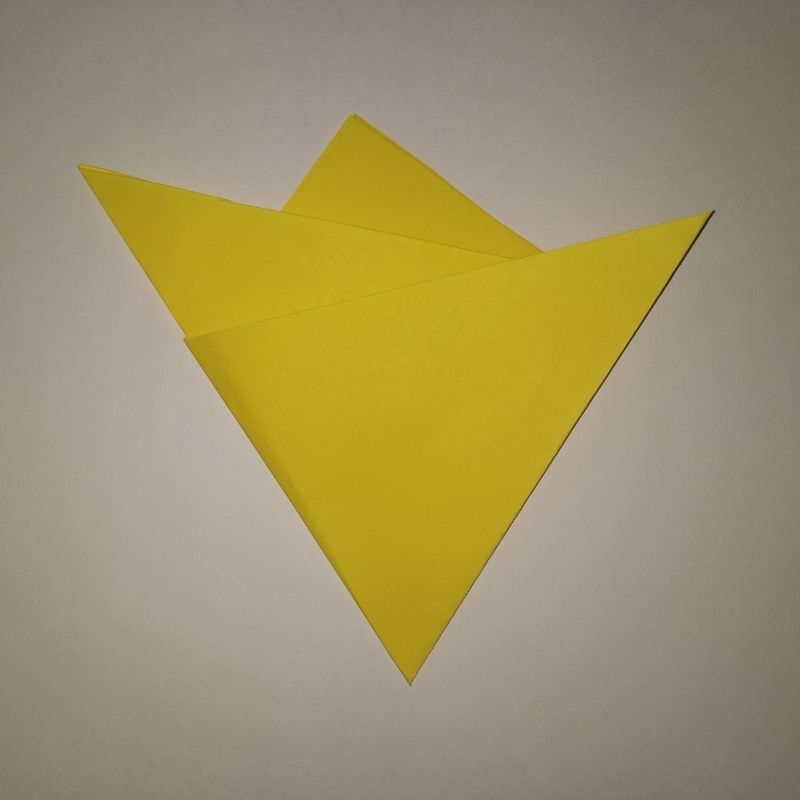
- Now fold this square into a triangle.
- Now fold the sides of the triangle with its base facing down..
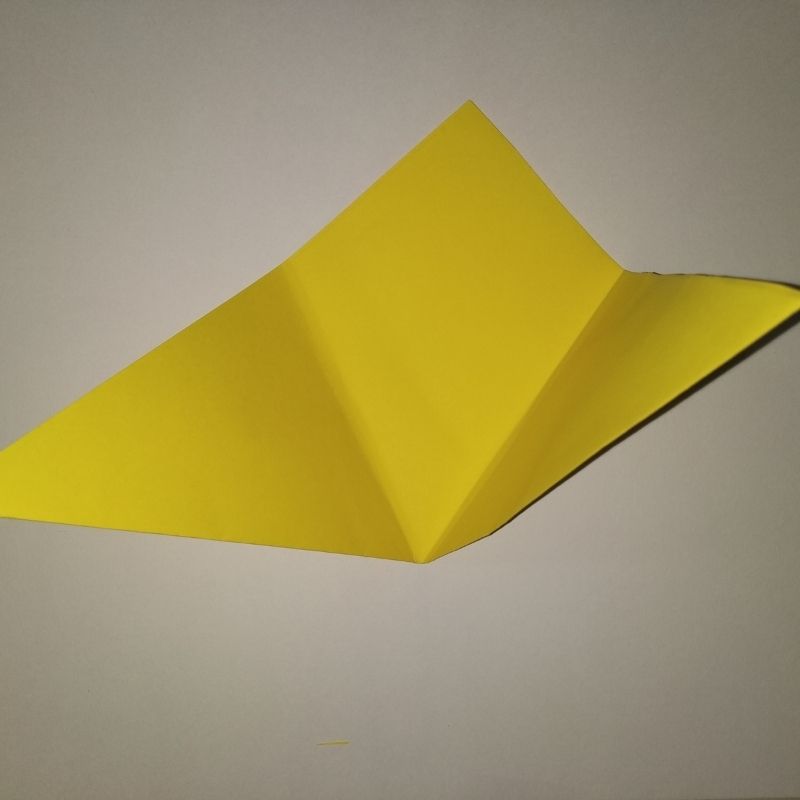
- Fold the sides overlapping each other.
- Now again fold this portion into half.
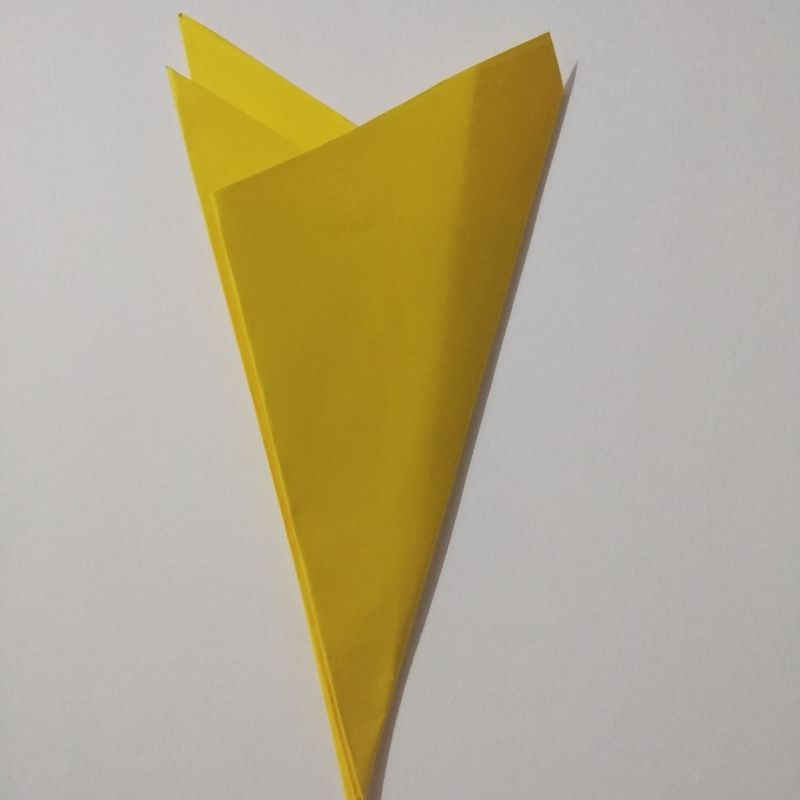
- This is the part of the paper where you need to draw the design for the daffodil papercut handicraft.
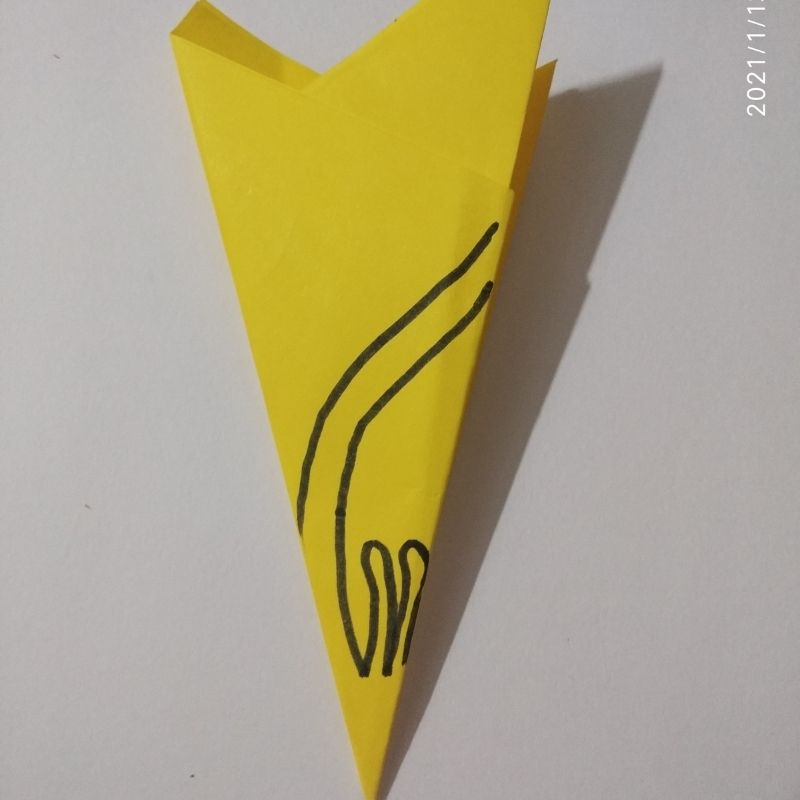
- Now draw the design using a sketch pen or a pencil on this folded vertical triangle.
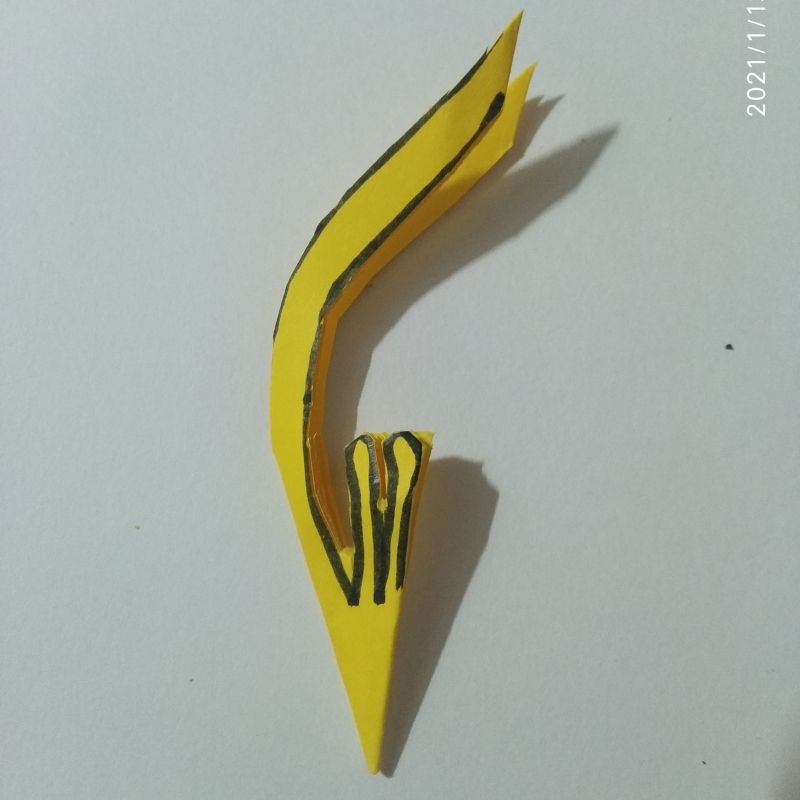
- Next, cut along the borders of the design.
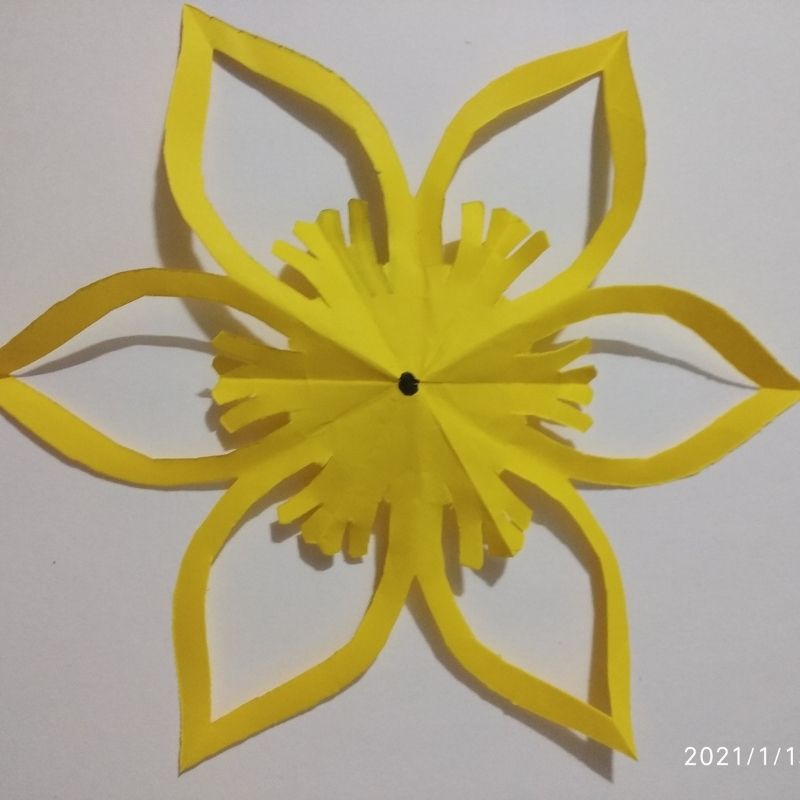
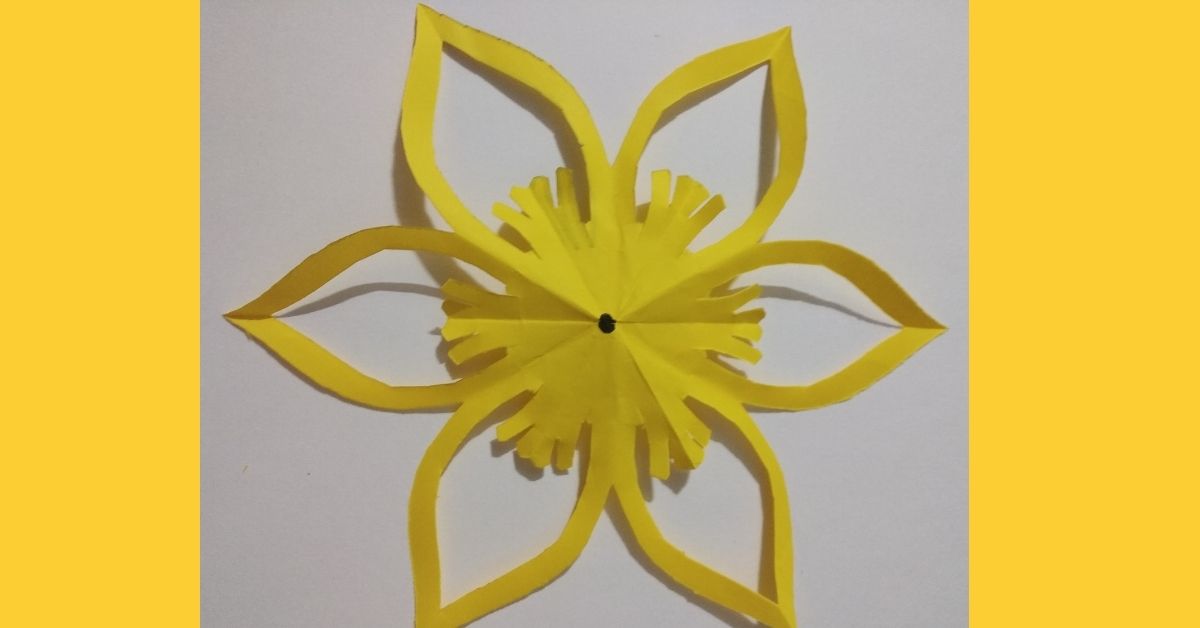
- Next, gently open the paper and you will be surprised to see a beautiful daffodil floral paper cut.
- That’s it, kids! Use this DIY paper daffodil as a beautiful wall hanging or use it as a gift tag.